한국어
This posting is applicable to the Linux environment of the Synology NAS, but it is also available to most people who use the dockers.
1. Installation
Based on the Synology NAS, search the docker registry as Jupiter.
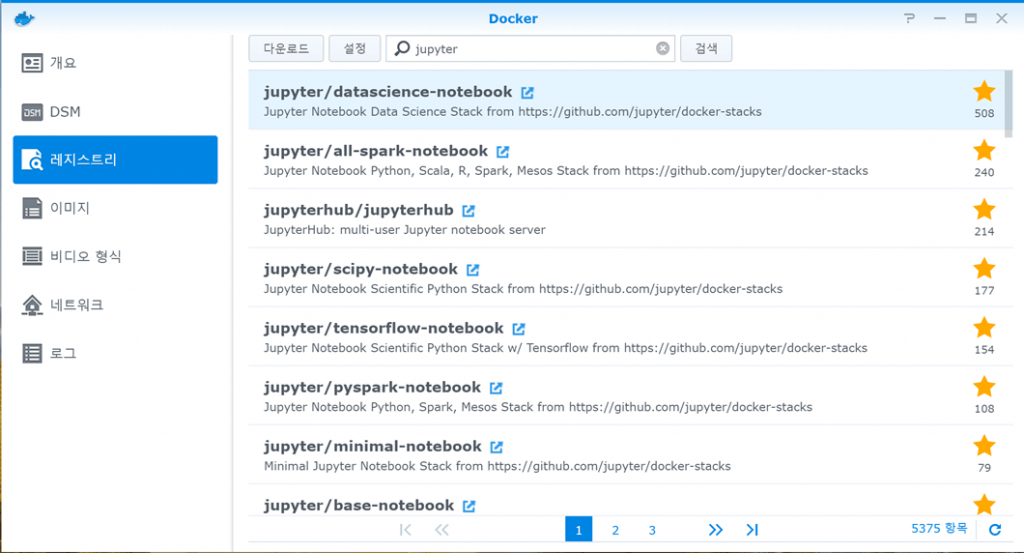
Double-click on the jupiter /datascience-notbook at the top to download.
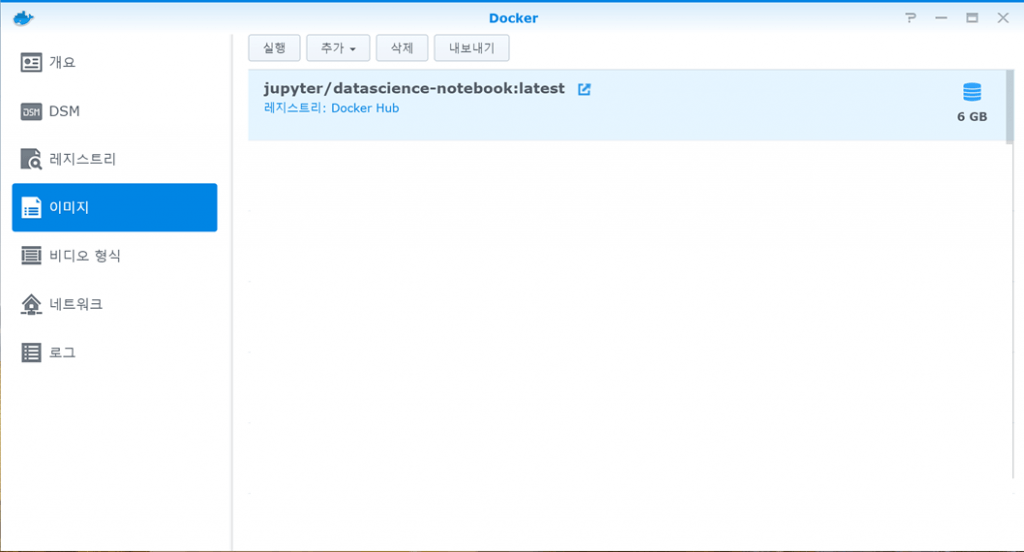
On the Images tab, double-click the downloaded image to start the installation. Installation details are as follows.
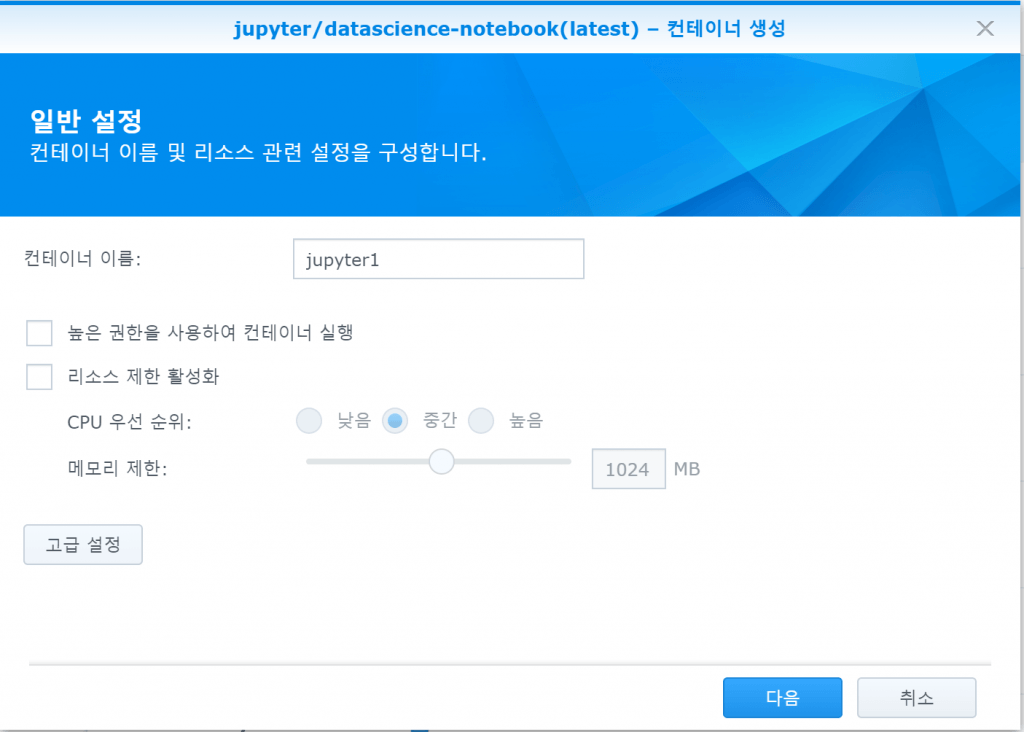
Set the container name as desired and press “Advanced Settings”.
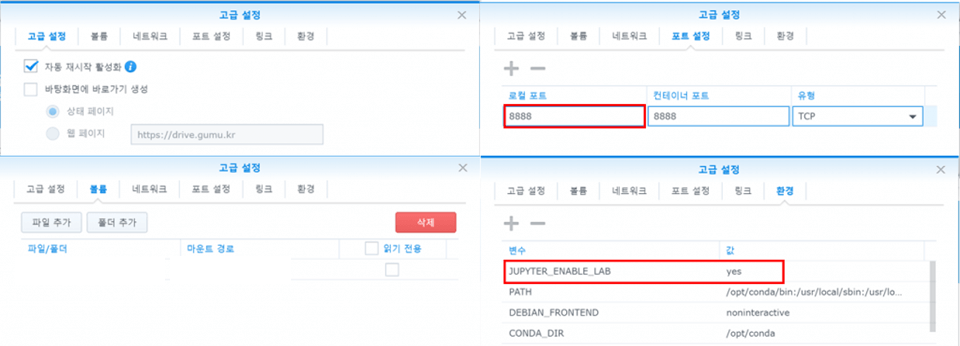
Advanced settings tab: Auto restart enable check
Volume: Set the desired shared folder and mount path: /home/jovyan/work/
Port settings: change local port to 8888
Environment: After adding the JUPYTER_ENABLE_LAB variable, the value is yes
Most of them are the same as installing a Jupiter notebook. In order to use a Jupiter Lab, you must add the variables listed above to the variables.
NOTE: If the “work” folder is not visible on the Jupiter lab or Jupiter Notebook when the volume is mounted, it is likely that it is not a docker problem but a shared folder permission issue. In Control Panel – Groups – Settings, give Read/Write permissions to mounted folders to user groups to resolves this problem.
Let’s make sure that the 8888 port is port-forwarded on the router.
2. Initiate
Run the jupyter container, and then run it in the browser address
http://[IP or DNS]:8888
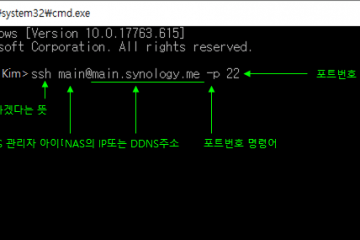
NOTE: If a docker is installed remotely like a NAS, you should write down the IP address of the remote site.
If the NAS has an IP of 192.168.0.2, the address will be http://192.168.0.2:8888
When you connect from the outside, you should use DDNS. If your NAS’s ddns is main.synology.me, you can connect to http://main.synology.me:8888
Once connected, you will see the following window:
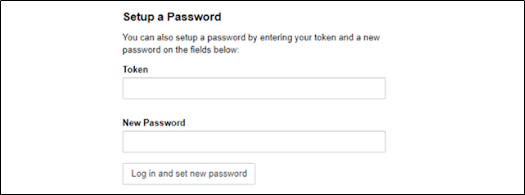
You can access with token only, but setting a password is somehow easy to use. Token can be found below.
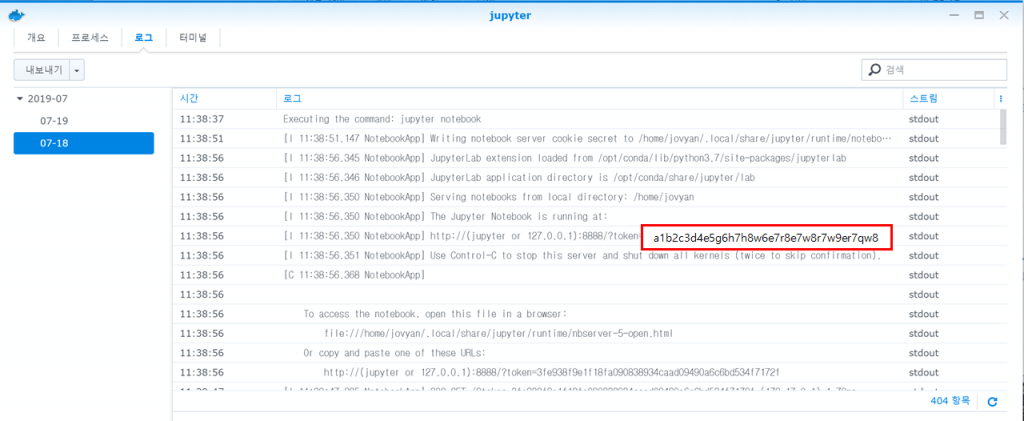
Dockers – Containers – double-click Installed jupiter and check the log. If you look closely at the log, you can see the text “token=” followed by the string “token” for connecting to the jupiter.
We’re ready to use! You can see Jupyter Lab after you set the new password.

If you don’t use the Jupiter Lab and want to use the previous Jupiter notbook, you can delete the lab behind the address bar and enter the tree.
NOTE: There is no “logout” button yet in Jupiter Lab. If you only want to log out of the system, not shut down, you have to go to the Jupiter Notebook and press the Logout button.
0 Comments